Do you want to show different menus to logged-in users in WordPress?
By default, WordPress allows you to show the same navigation menu in a specific location in your theme. But what if you wanted to show a different menu to logged-in users on your website?
In this article, we’ll show you how to easily show different menus to logged-in users in WordPress.
Why Show Different Menus to Logged in Users in WordPress?
Changing different areas of your WordPress website based on your visitors and their activity makes your site feel personalized for each user.
This personalized content helps you improve the user experience on your WordPress website.
Now, if you run a website where users don’t need to register or log in, then you can probably use the same navigation menus across your website.
However, other websites may greatly benefit from showing custom menus to logged-in users.
For instance, websites like an online store, a WordPress membership site community, or an online learning platform, can all benefit from personalized navigation menus.
A personalized navigation menu for logged-in users helps them more easily find things they signed up for.
For instance, a user on an online store can manage their account, or a member of a paid community can easily renew their subscription or view the online courses they purchased.
By default, WordPress does let you create as many navigation menus as you want. However, you can only choose to show one menu at a particular location in your WordPress theme.
That being said, let’s take a look at how to easily change this behavior and show different menus to logged-in users in WordPress.
Creating Menus for Logged in and Non Logged in Users in WordPress
No matter which method you use, you’ll first need to create both of the navigation menus that you want to show to your logged-in and logged-out users.
Simply head over to the Appearance » Menus page in the WordPress dashboard. If you already have a navigation menu that you use on your website for all users, then this can be your default menu.

After that, click on the ‘create a new menu’ link to create a new custom menu for your logged-in users.
Here you can add menu items that you want to show to registered or logged-in users. For example, you might want to add a logout link to your menu.
On the left-hand side of the screen, you can see a list of your website pages. Simply check the box next to any page you want to add to your menu and click the ‘Add to Menu’ button.
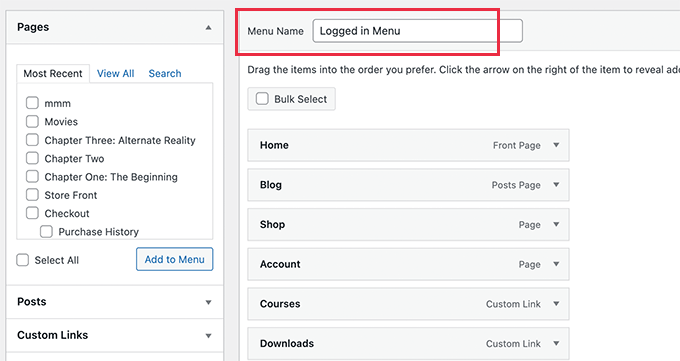
You can also drag and drop the menu items on the right side of the screen to rearrange them.
Further down the page, you can choose a location to display your menu. But, you don’t need to assign a location to this menu now. We’ll do that later in the article.
Don’t forget to click on the ‘Save Menu’ button to store your changes.
For more details on creating menus, take a look at our beginner’s guide to WordPress navigation menus.
This method is easier and recommended for all WordPress users.
First, you need to install and activate the Conditional Menus plugin. For more details, see our step-by-step guide on how to install a WordPress plugin.
Upon activation, you need to visit the Appearance » Menus page and switch to the ‘Manage Locations’ tab.
From here, you’ll see the list of available menu locations defined in your WordPress theme and the menus that are currently displaying.
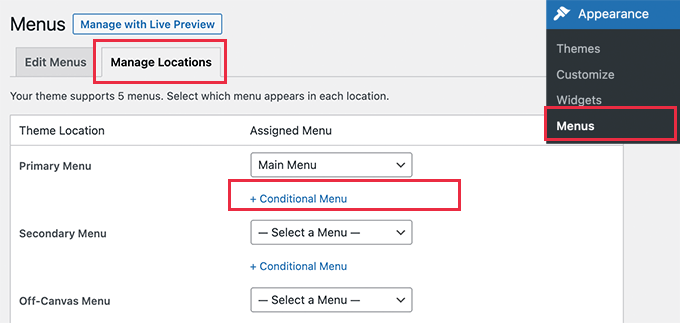
For instance, it is showing that our Primary Menu location is showing a navigation menu titled ‘Main Menu’.
Now, we need to tell the plugin to show a different menu when a certain condition is matched.
To do that, click on the ‘+ Conditional Menu’ link, and then select the navigation menu you want to show to the logged-in users from the drop-down menu.

Next, you need to click on the ‘+ Conditions’ link.
This will bring up a popup where you’ll see a bunch of conditions to choose from.
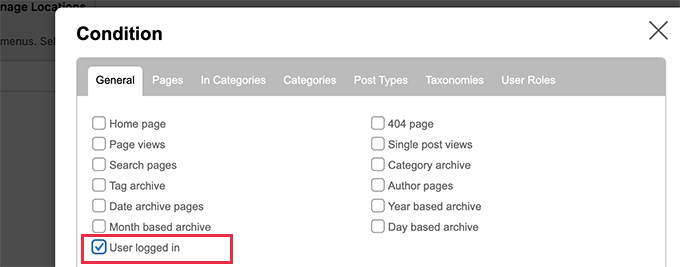
Simply check the box next to the ‘User logged in’ option, and then click on the Save button.
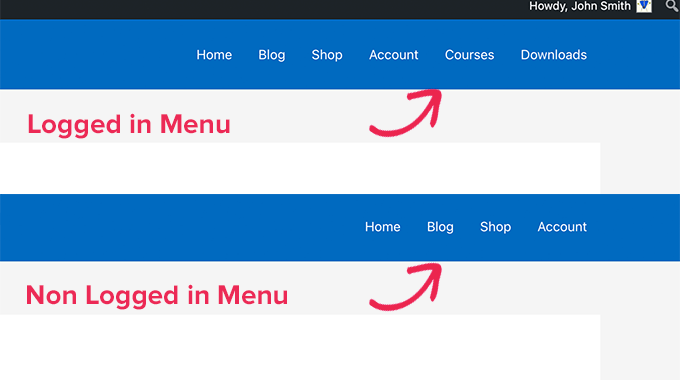
You can now visit your website to see the logged-in user menu in action. You can also log out of your WordPress admin to view the navigation menu that’ll be shown to all other users.
This method requires you to add code to your WordPress website. If you haven’t done this before, then take a look at our guide on how to copy and paste code snippets in WordPress.
First, you need to add the following code to your theme’s functions.php file or a site-specific plugin.
function my_wp_nav_menu_args( $args="" ) {
if( is_user_logged_in() ) {
// Logged in menu to display
$args['menu'] = 43;

} else {
// Non-logged-in menu to display
$args['menu'] = 35;
}
return $args;
}
add_filter( 'wp_nav_menu_args', 'my_wp_nav_menu_args' );
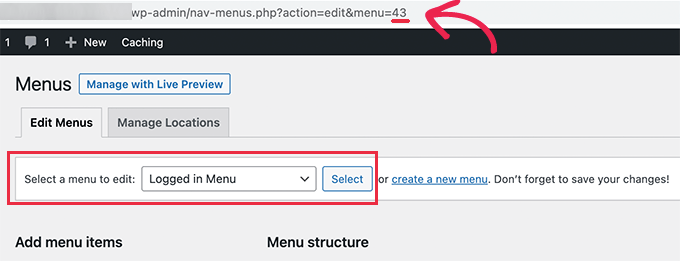
Make sure that you replace 43 and 35 with the IDs for navigation menus you created earlier.
You can find the ID of a navigation menu by selecting it on the Menus page. You will see the menu ID number in your browser’s address bar.
We hope this article helped you learn how to easily show different navigation menus to logged-in users in WordPress.
